Valentine’s Day is the perfect excuse to give your nails a little extra love, and you do not need a salon appointment or a steady artist’s hand to make it happen. The season’s prettiest looks are built on simple ideas: a classic red, a soft blush pink, and one tiny heart placed exactly where it shows best. With a steady base coat, two or three polish shades, and a dotting tool or a toothpick, you can create designs that look polished, romantic, and completely ready for dinner, a date night, or a Galentine’s brunch with friends.
This guide collects fourteen Valentine’s nail ideas that range from bold cherry reds to quiet, barely-there pinks, so there is something here for every mood and every nail length. Each idea explains the colours, the placement, and the small finishing details that make the design feel intentional rather than rushed. Pick one, paint it the night before, and wake up to nails that already feel festive. Whether you prefer a bold red or a barely-there blush, each design below is written so a complete beginner can follow it with the polish already sitting in a drawer at home.
In This Guide
- 1. Classic Red Almond Nails
- 2. Tiny Heart Accent Nails
- 3. Soft Pink French Tips With a Heart
- 4. Cherry Red and White Hearts
- 5. Blush Pink Chrome Nails
- 6. Red and Pink Ombré Nails
- 7. Heart French Tips
- 8. Minimalist Single Heart Nails
- 9. Glitter Heart Nails
- 10. Burgundy and Rose Gold Nails
- 11. Conversation Heart Nails
- 12. Pink Jelly Nails
- 13. Red French Tips With Gold Hearts
- 14. Short Natural Valentine’s Nails
- Conclusion
- Frequently Asked Questions About Valentine’s Nails
1. Classic Red Almond Nails
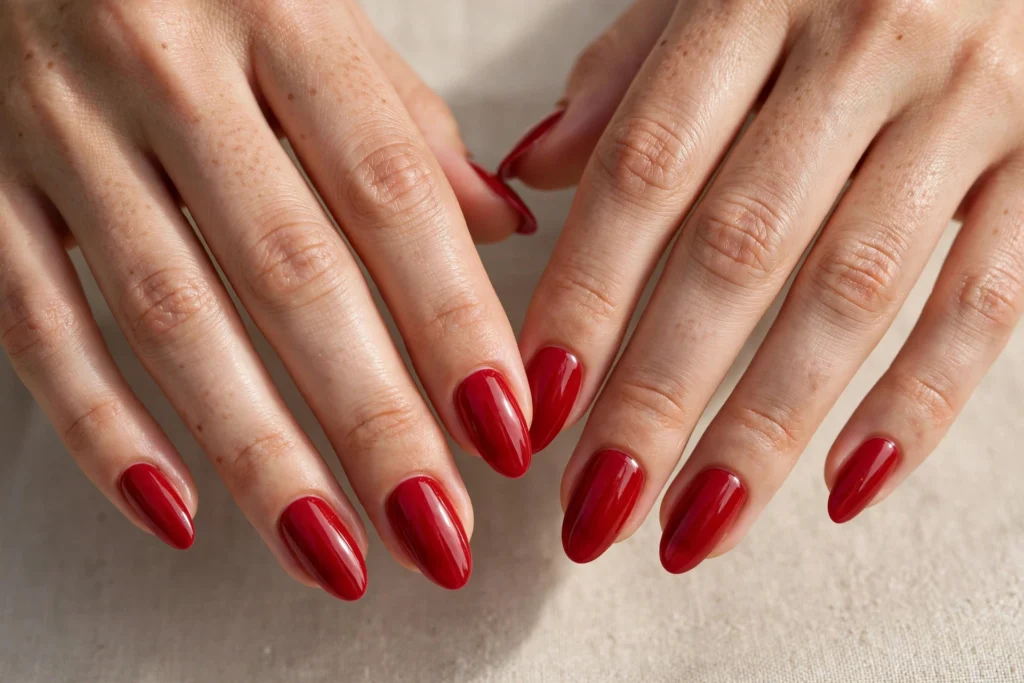
A classic red on an almond shape is the Valentine’s manicure that never goes out of style, because it reads as confident, romantic, and polished all at once. Choose a true cherry red rather than an orange-red, since a blue-based red flatters every skin tone and looks especially rich against winter knits and evening outfits. Two thin coats give a glossy, even finish, and a top coat keeps the colour fresh for a full week. The almond shape softens the boldness of the red, so the final look feels elegant rather than loud.
Keep the rest of your styling simple so the nails stay the star, with a bare wrist or one delicate bracelet and a neutral lip. This look works for a formal dinner, a workday that runs into the evening, or a quiet night in, because red nails suit every setting without trying too hard. If your nails are short, the same shade still works beautifully, since a true red makes even a short nail look neat and intentional. Finish with cuticle oil for a clean, salon-like edge. A weekly top coat refresh keeps the red looking freshly painted, and storing the polish upright in a cool drawer prevents it from thickening between manicures.
2. Tiny Heart Accent Nails
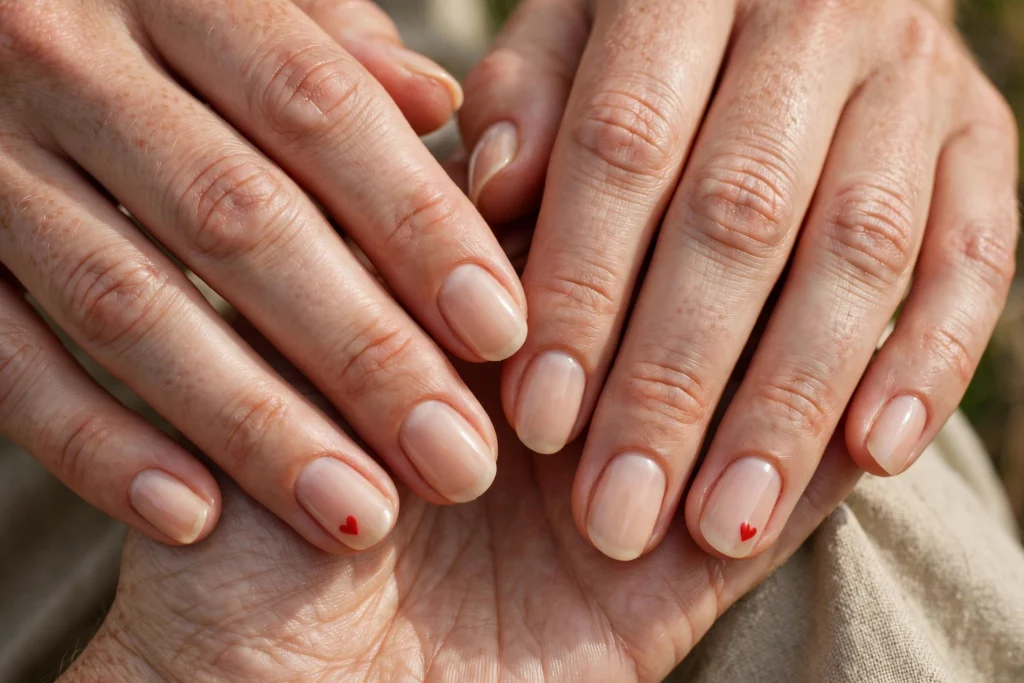
Tiny heart accent nails are the easiest way to nod to Valentine’s Day without committing every nail to a theme. Paint all ten nails in a soft nude or blush pink, then add one small heart to each ring finger, either in red, cherry, or a deeper rose. A dotting tool makes the heart in two dots and a small triangle, and a toothpick works just as well if you do not own one. Keep the hearts the same size on both hands so the design looks balanced and deliberate.
This style suits anyone who likes a subtle manicure, because the base colour stays neutral while the heart adds one playful detail. It also grows out gracefully, since a nude base hides regrowth far better than a dark shade. For a slightly dressier version, add a single dot of gold glitter above the heart, or outline the heart in a thin metallic line. The result is sweet, understated, and easy to wear long after Valentine’s Day has passed. If you want the hearts to last, seal them with two thin layers of top coat and avoid soaking your hands in hot water for the first few hours after painting.
3. Soft Pink French Tips With a Heart
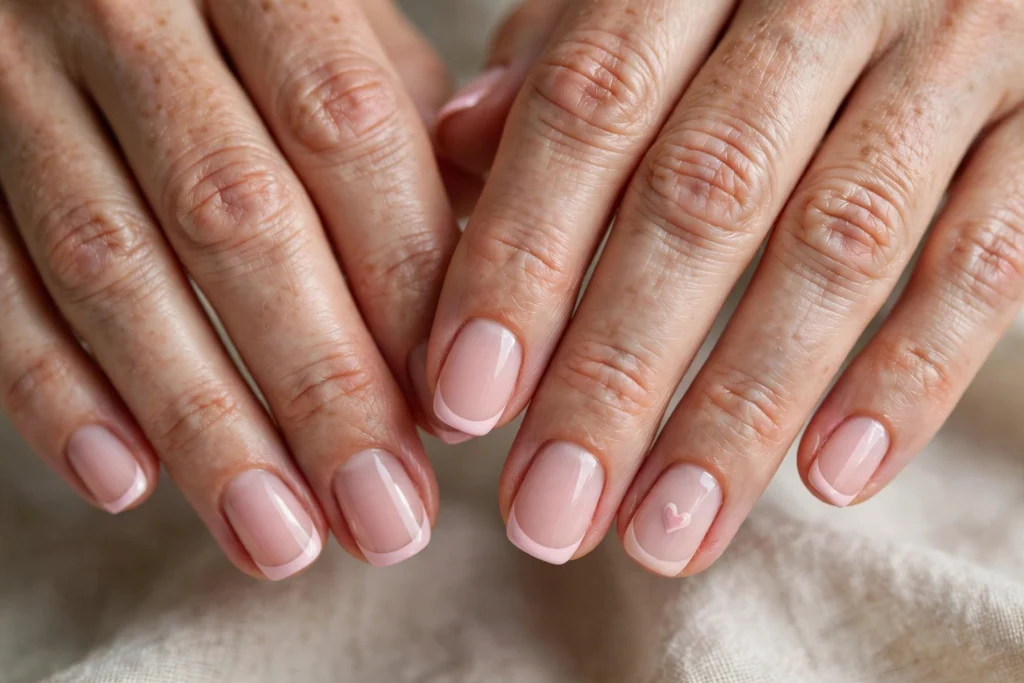
Soft pink French tips with a heart combine the cleanest classic manicure with one romantic twist, and the combination feels fresh rather than fussy. Start with a sheer pink base across the whole nail, then paint a white or blush tip in the usual French shape. On one accent nail, replace the tip with a small heart in the same white or blush shade, so the design reads as a French manicure with a secret. A thin brush keeps the lines crisp, and a glossy top coat ties everything together.
This look is ideal for anyone who wants Valentine’s nails that still feel office-friendly, since the palette stays pale and the heart appears only once. It also suits short nails beautifully, because a narrow tip makes the nail look longer without adding length. If you want a little more sparkle, add a faint shimmer to the base coat or a single rhinestone at the heart’s centre. The finished manicure is soft, romantic, and easy to pair with any outfit. Reapply the top coat after two days to keep the tips crisp, and keep a small brush and polish remover nearby for quick touch-ups before any Valentine’s event.
4. Cherry Red and White Hearts
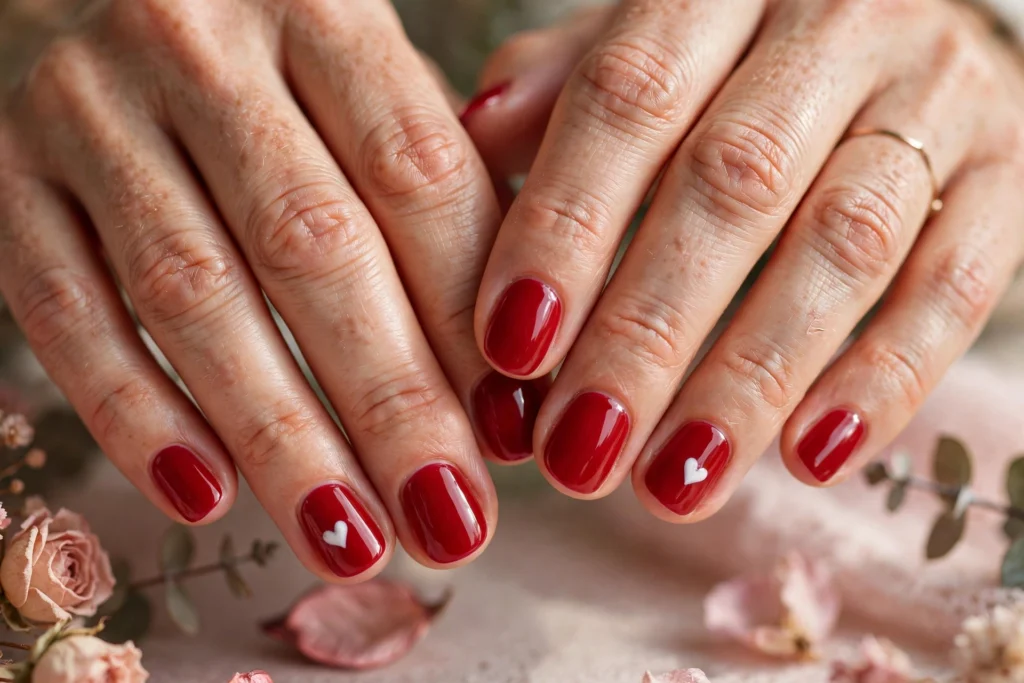
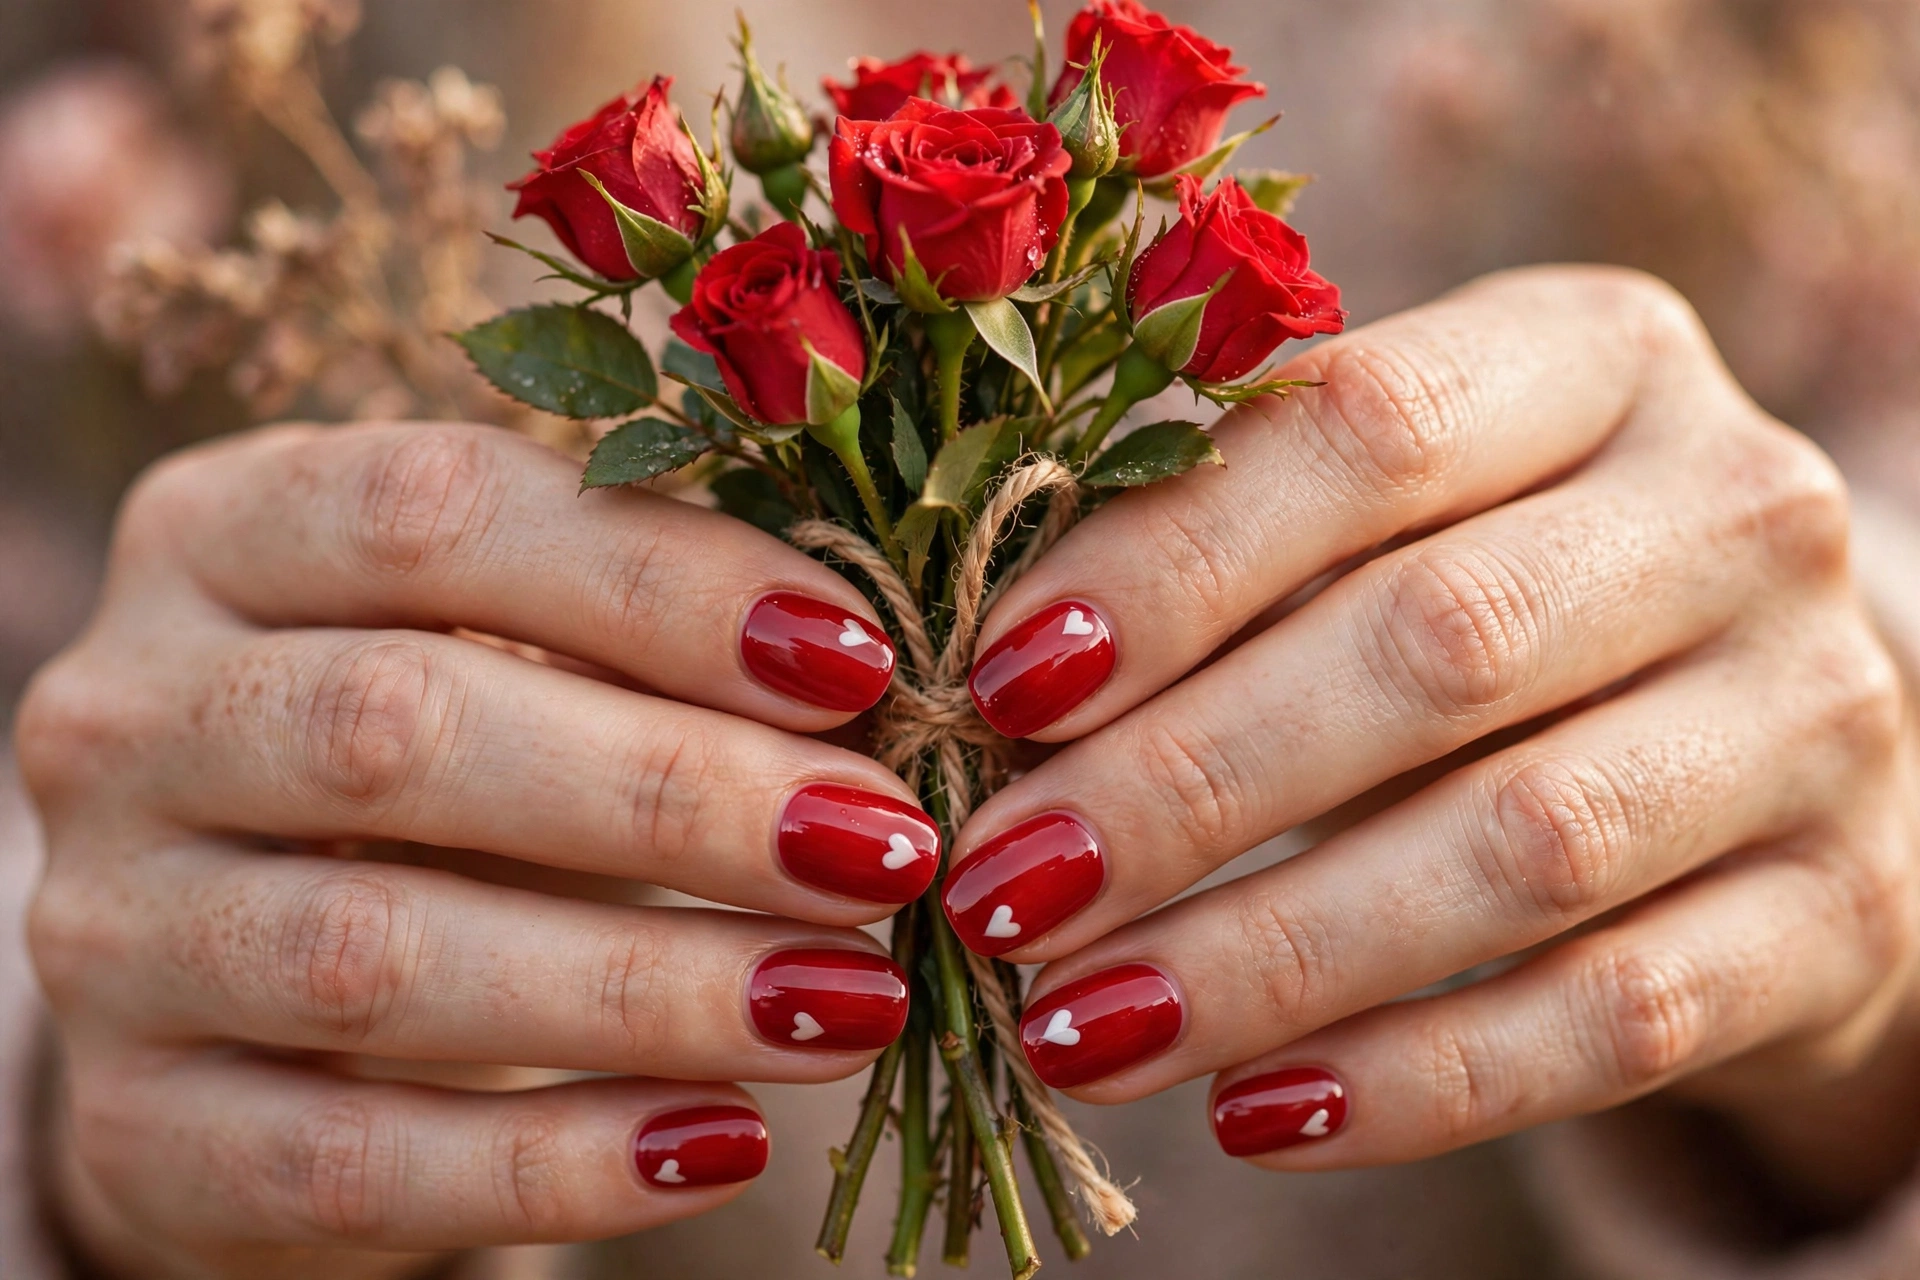
Cherry red and white hearts are the boldest version of a Valentine’s manicure, and they photograph beautifully against a white sweater or a red lip. Paint a cherry red base on every nail, then scatter small white hearts across two or three accent nails, keeping the rest solid red so the design stays balanced. A dotting tool gives the cleanest hearts, and a thin brush helps tidy the edges if one heart lands slightly off-centre. Two coats of top coat smooth the design and lock in the shine. Work one hand at a time so the hearts stay neat, and let each layer dry fully before adding the next.
This style is perfect for a party, a date night, or any evening when you want your nails to make a statement. Because the base is a strong red, the white hearts pop clearly, so the design reads as Valentine’s even from across the room. Keep your jewellery minimal, since the nails already carry the look, and choose a red lip in the same cherry family for a coordinated finish. The result is festive, confident, and unmistakably romantic. A clear top coat reapplied midweek keeps the white hearts bright, and a quick cuticle oil massage before bed keeps the whole manicure looking freshly done.
5. Blush Pink Chrome Nails
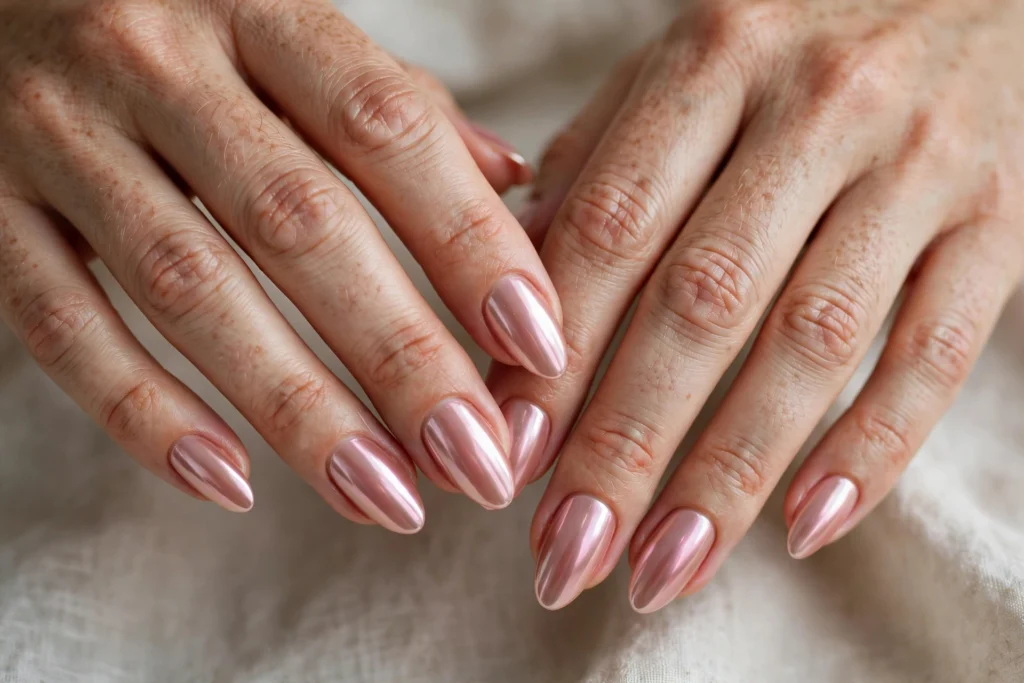
Blush pink chrome nails give Valentine’s Day a soft, modern glow, because the chrome finish catches light without any glitter or extra decoration. Start with a blush pink base, then buff a pearl chrome powder over the tacky layer, following the product’s instructions, and seal it with a no-wipe top coat. The result is a smooth, mirror-like pink that shifts gently in different light, looking rose in daylight and almost champagne indoors. The finish feels luxurious without a single embellishment. Apply the powder over a tacky, uncured layer and buff it in gentle circles until the shine looks perfectly even across every nail.
This look suits every nail length, from short and square to long and almond, because the chrome effect does all the visual work. It also pairs beautifully with satin dresses, soft knits, and silver jewellery, since the pearl tone echoes the fabric’s sheen. For a slightly deeper version, use a rose pink base under the same chrome powder, which gives a warmer, richer glow. Add a thin gold ring or two, and the manicure feels complete and quietly glamorous. A no-wipe top coat is essential here, since it protects the chrome layer and keeps the mirror shine from dulling after a day or two.
6. Red and Pink Ombré Nails
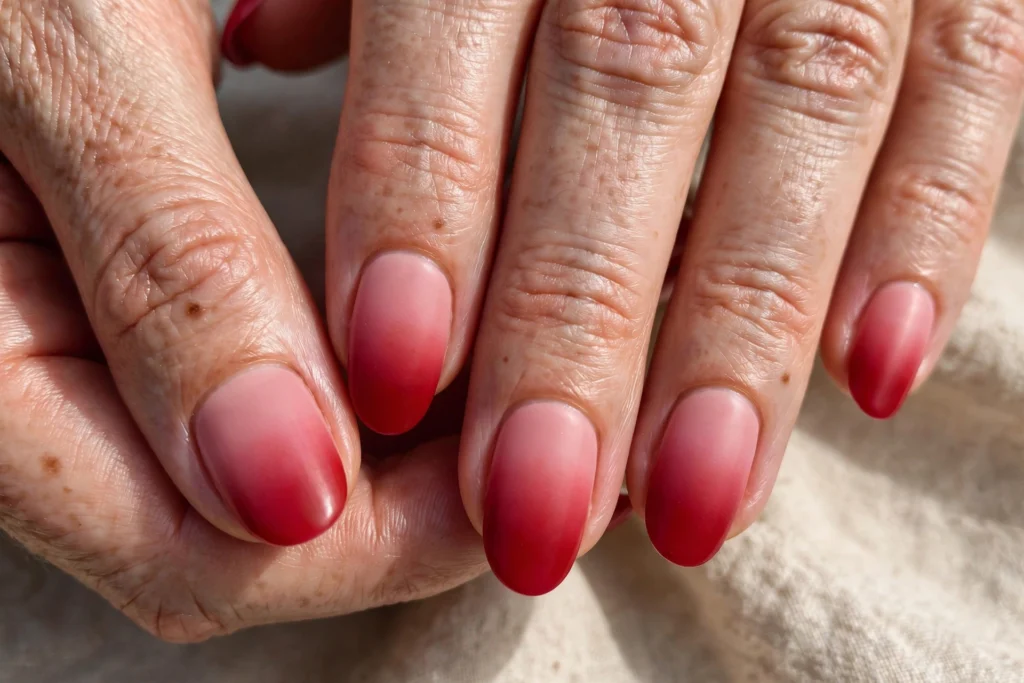
Red and pink ombré nails blend two Valentine’s shades into one smooth gradient, and the effect looks far more complicated than it actually is. Paint a light pink base on every nail, then sponge a cherry red onto the tip, dabbing gently so the two colours melt into each other. A makeup sponge gives the softest blend, and two or three light passes build the gradient without thick, streaky layers. A glossy top coat smooths the transition and makes the ombré look seamless. Clean the sponge edges between passes so no stray colour lands on the skin, and wipe the cuticles with a small brush dipped in remover.
This design works on every nail shape, and it is especially flattering on medium and long nails, where the gradient has room to show. Because the colours stay in the same family, the manicure feels cohesive rather than busy, and it pairs well with both casual and formal outfits. For a softer version, swap the cherry red for a dusty rose, which gives a blush-to-pink fade that feels dreamy. Finish with cuticle oil, and the gradient will look freshly done for days. If the gradient looks patchy, add one more light sponging pass rather than a heavy coat, since thin layers blend far more smoothly than thick ones.
7. Heart French Tips
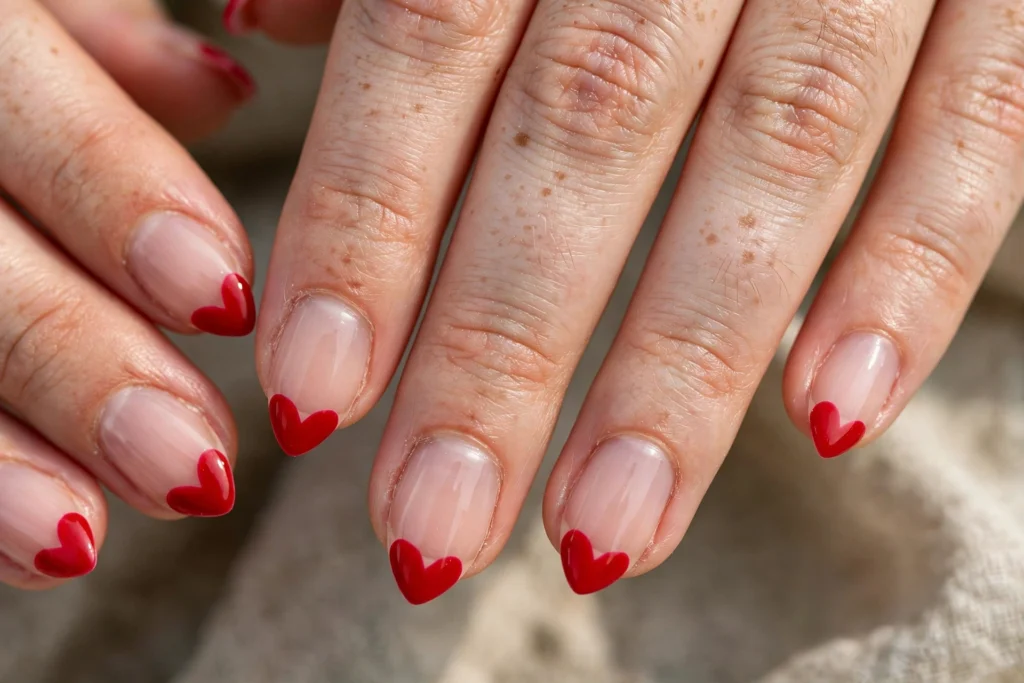
Heart French tips turn the classic French manicure into a Valentine’s design by shaping each tip into a heart, and the result is playful without being over the top. Paint a sheer nude or pale pink base, then use a thin brush to draw a heart shape at the tip of each nail, with the heart’s point facing down toward the nail bed. Red, cherry, or blush hearts all work, and keeping one colour across all ten nails makes the design look tidy. A steady hand matters more than speed, so paint slowly and clean up edges with a small brush.
This style is a favourite for Valentine’s photos, because the hearts show clearly in every close-up and the base stays neutral. It also suits short nails, since the heart tip uses the free edge rather than the whole nail. For a softer take, use a dusty pink heart instead of red, which keeps the design romantic but quiet. Add a glossy top coat, and the hearts will look crisp, shiny, and ready for the whole Valentine’s week. Let each heart dry for a minute before the top coat, and use a thin brush to tidy any wobbly edge before the design sets completely.
8. Minimalist Single Heart Nails
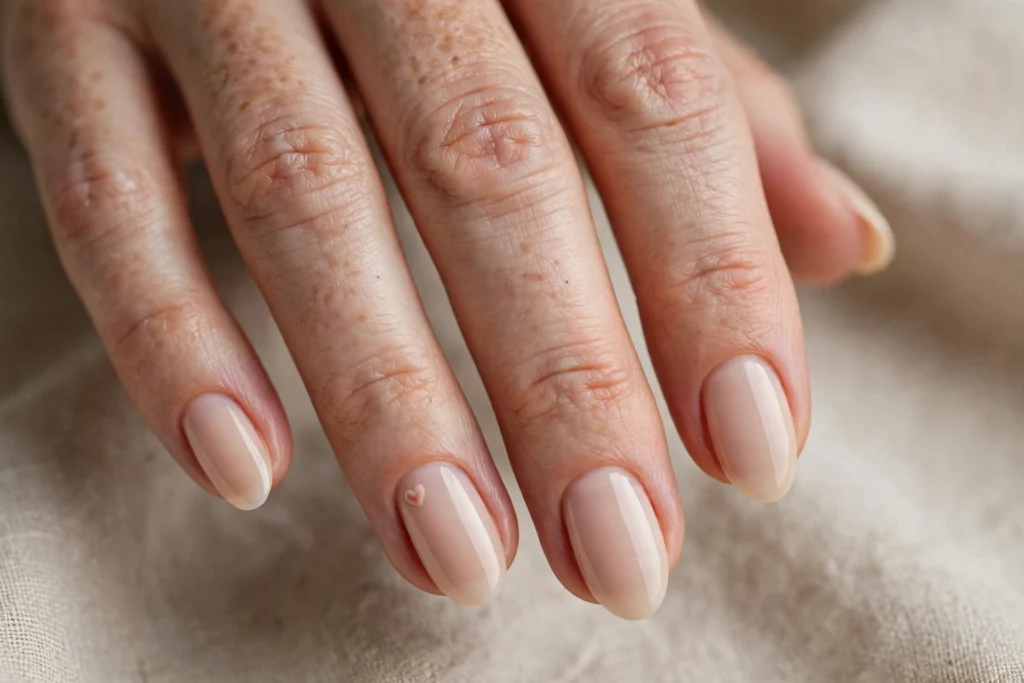
Minimalist single heart nails prove that one small detail can carry an entire manicure, and this look is the easiest on the list. Paint every nail in a clean nude, milky white, or sheer pink, then place a single tiny heart near the base of one accent nail on each hand. A dotting tool gives the neatest heart, and a single coat of top coat keeps the design flat and smooth. The rest of the nails stay bare and polished, so the heart feels like a quiet surprise rather than a theme.
This style is perfect for anyone who prefers a natural manicure, or for a workplace where bold nail art feels out of place. It also works beautifully on very short nails, because the heart needs only a few millimetres of space. For a slightly dressier version, paint the heart in metallic gold or rose gold, which catches the light without adding colour. The finished look is subtle, elegant, and easy to repeat all year round. A ridge-filling base coat helps the nude polish sit smoothly, and a weekly top coat refresh keeps the single heart looking neat for days.
9. Glitter Heart Nails
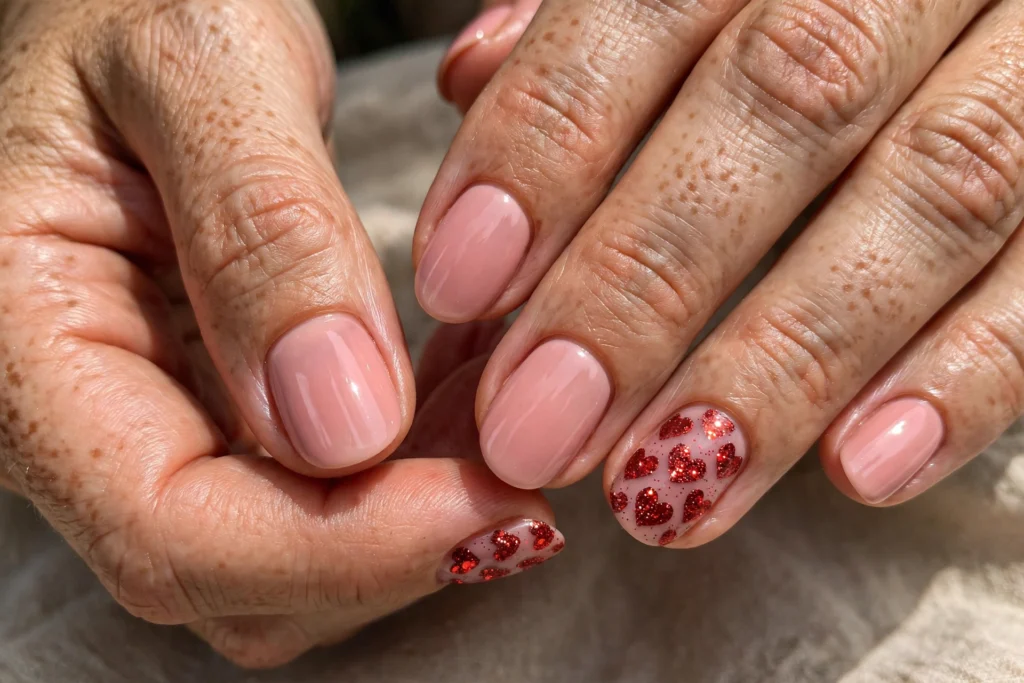
Glitter heart nails add sparkle to Valentine’s Day without turning the whole manicure into glitter, because the glitter stays inside the heart shape. Paint a blush pink or nude base on every nail, then fill a heart outline on each accent nail with fine red, rose, or gold glitter polish. A thin brush keeps the glitter inside the lines, and a thick top coat smooths the texture so the design feels flat and glossy. The contrast between the matte base and the sparkling heart makes the design stand out. Let the glitter layer dry fully before sealing it, so the sparkle stays evenly spread instead of dragging toward one edge.
This look is ideal for evening events, parties, and photos, because the glitter catches the light in every picture. It also works on short nails, since the heart can sit small and centred on the nail. For a softer version, use a pale champagne glitter instead of red, which gives a gentle shimmer rather than a bold flash. Keep the rest of your jewellery simple, and let the glitter hearts carry the sparkle for the whole outfit. A thick top coat smooths the glitter texture beautifully, and a second coat the next day keeps the shine looking freshly applied all week.
10. Burgundy and Rose Gold Nails

Burgundy and rose gold nails bring a deeper, more evening-ready mood to Valentine’s Day, and the pairing feels rich without being heavy. Paint most nails in a deep burgundy or wine shade, then use rose gold on one or two accent nails, either as a full colour, a French tip, or a thin stripe. The warm metallic softens the dark burgundy, so the manicure reads as romantic rather than moody. Two coats of each shade and a glossy top coat keep the finish even and long-lasting. Paint the accent nails first so the metallic has time to settle, and keep the burgundy coats thin to avoid streaks along the edges.
This combination suits formal dinners, evening weddings, and any event where you want your nails to feel polished and grown-up. It also flatters every skin tone, because burgundy is a universally flattering red and rose gold adds warmth without clashing. For a little extra detail, add a single small heart in rose gold on a burgundy accent nail. The result is elegant, festive, and easy to wear with gold jewellery and dark winter outfits. A gold clutch or thin gold hoops echo the rose gold accent, and a deep berry lip in the same family ties the whole evening look together.
11. Conversation Heart Nails
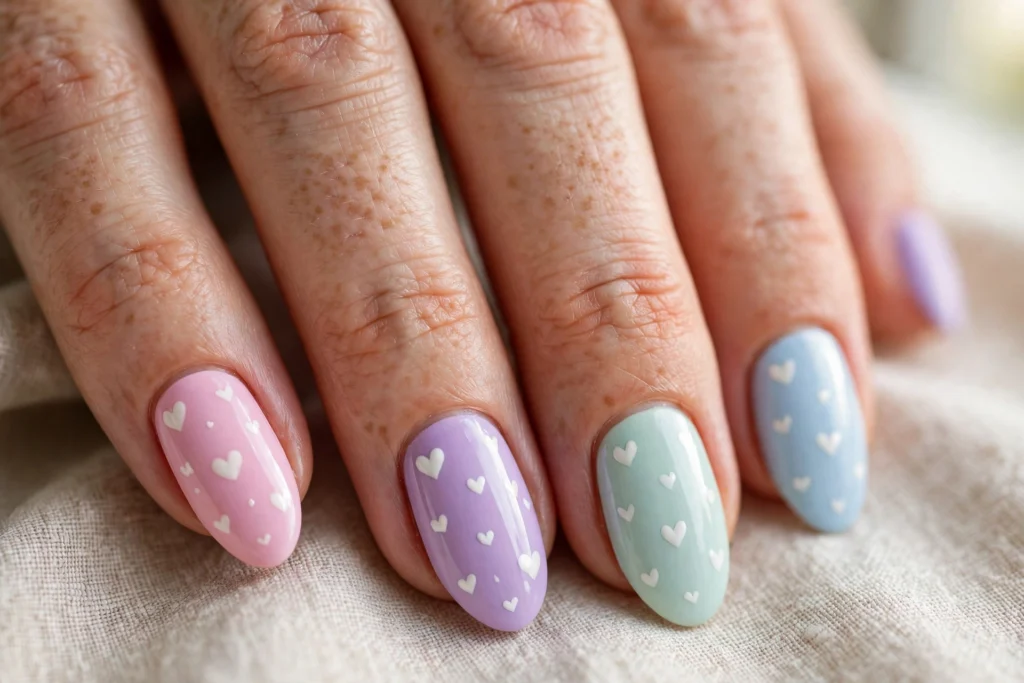
Conversation heart nails borrow the sweet, candy-style hearts from Valentine’s Day cards, and they are the most playful design on this list. Paint each nail in a pastel shade, such as blush pink, lilac, mint, or baby blue, then add a small heart to each nail in white or a contrasting pastel. A fine brush or a nail art pen keeps the hearts neat, and a tiny dot of a darker shade in the heart’s centre adds a candy-like touch. Keep the hearts small so the pastel base still shows through.
This style is perfect for Galentine’s parties, brunch with friends, or anyone who likes a fun, lighthearted manicure. Because the palette stays pastel, the design feels cheerful rather than loud, and it pairs well with light knits and denim. For a simpler version, paint the hearts on only two accent nails and leave the rest solid pastel. The finished look is sweet, nostalgic, and guaranteed to start a conversation at any Valentine’s gathering. Keep a small dotting tool handy for quick fixes, and seal the hearts with two thin top coat layers so the pastel colours stay bright through the whole evening.
12. Pink Jelly Nails
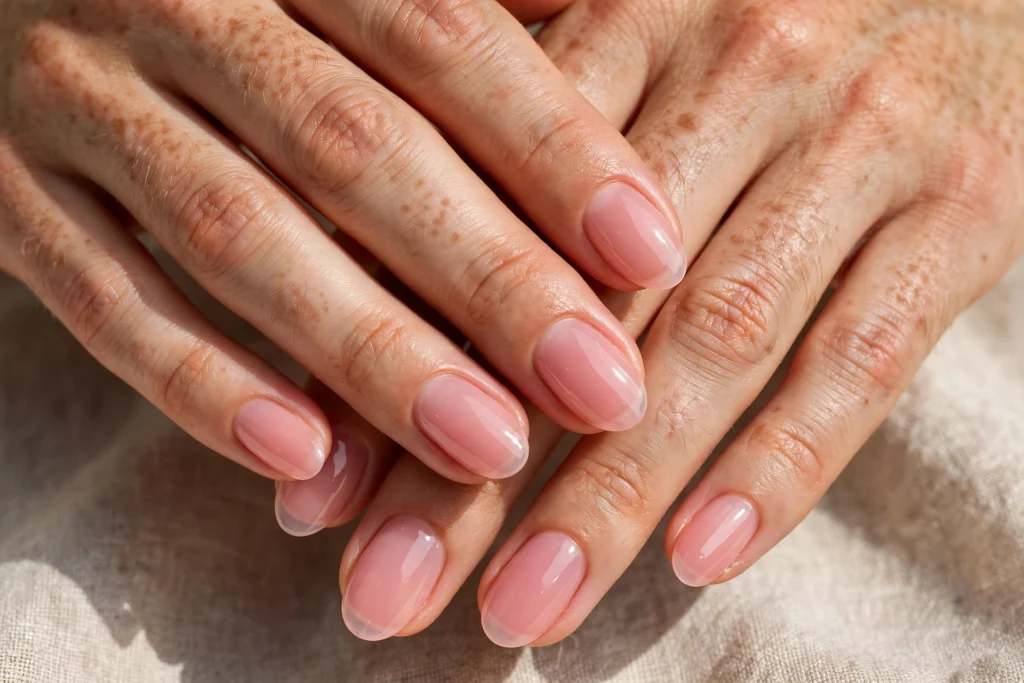
Pink jelly nails give a glossy, see-through wash of colour that looks fresh, juicy, and completely modern. Apply one or two thin coats of a sheer pink jelly polish over a clear base, building the colour slowly so the nail still shows through underneath. The translucent finish catches light like glass, and a glossy top coat deepens the shine without adding any decoration. The result feels clean and youthful, with just enough colour to read as Valentine’s pink. Work with thin coats and let each one dry fully, since a thick jelly layer can pool at the cuticle and look uneven once it sets.
This style suits every nail length, and it is especially flattering on short, natural nails, where the sheer finish looks neat and healthy. It also grows out gracefully, since the sheer colour hides regrowth far better than an opaque shade. For a slightly deeper version, layer a second coat only on the tips, which gives a soft gradient without any sponging. Add a clear top coat every few days, and the jelly shine will last well past Valentine’s Day. Store the jelly polish upright and roll the bottle gently before use, which keeps the sheer colour smooth and free of bubbles.
13. Red French Tips With Gold Hearts
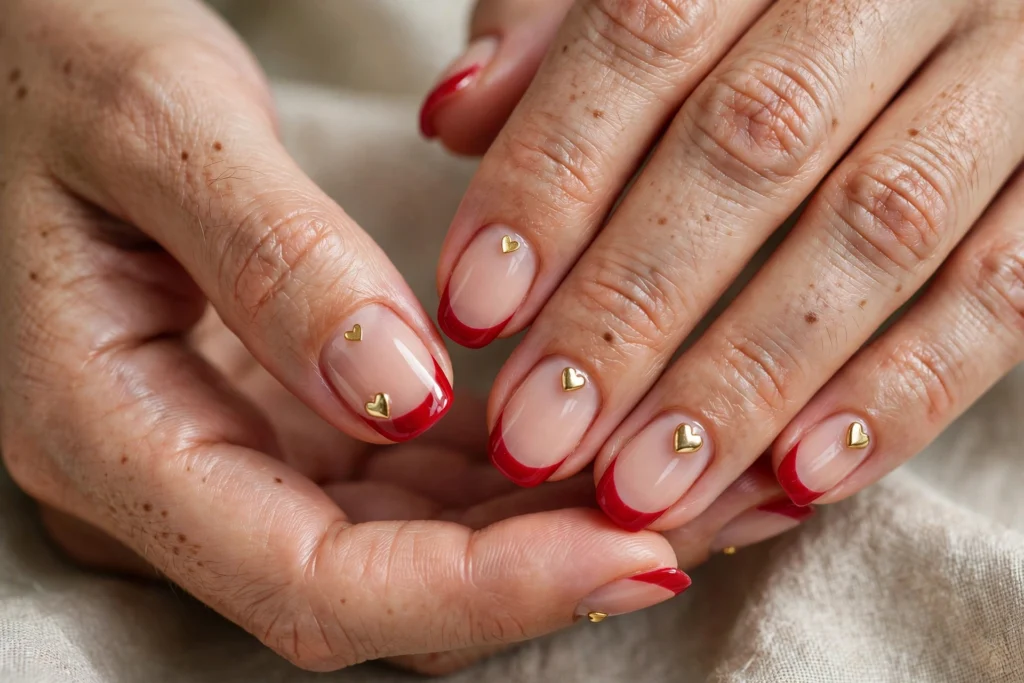
Red French tips with gold hearts combine two Valentine’s classics into one polished design, and the gold keeps the red from feeling too bold. Paint a sheer nude or pale pink base, then add a cherry red French tip in the usual curved shape. On one accent nail, place a small gold heart at the centre of the tip, or scatter two tiny gold hearts along the smile line. A thin brush keeps the tip crisp, and a glossy top coat locks the gold in place. Draw the smile line slowly and clean up the edges with a small brush, since a neat curve makes the whole French tip look professional.
This look is ideal for anyone who wants Valentine’s nails with a touch of glamour, since the gold adds a jewellery-like detail. It also suits medium and long nails best, because the tip has room to show both the red and the heart. For a softer version, use a dusty rose tip instead of cherry red, which keeps the design romantic but quiet. Pair the manicure with gold hoops or a thin gold bracelet, and the whole look feels coordinated and festive. A midweek top coat refresh keeps the gold hearts bright, and a quick cuticle oil massage before bed keeps the tips looking freshly painted.
14. Short Natural Valentine’s Nails
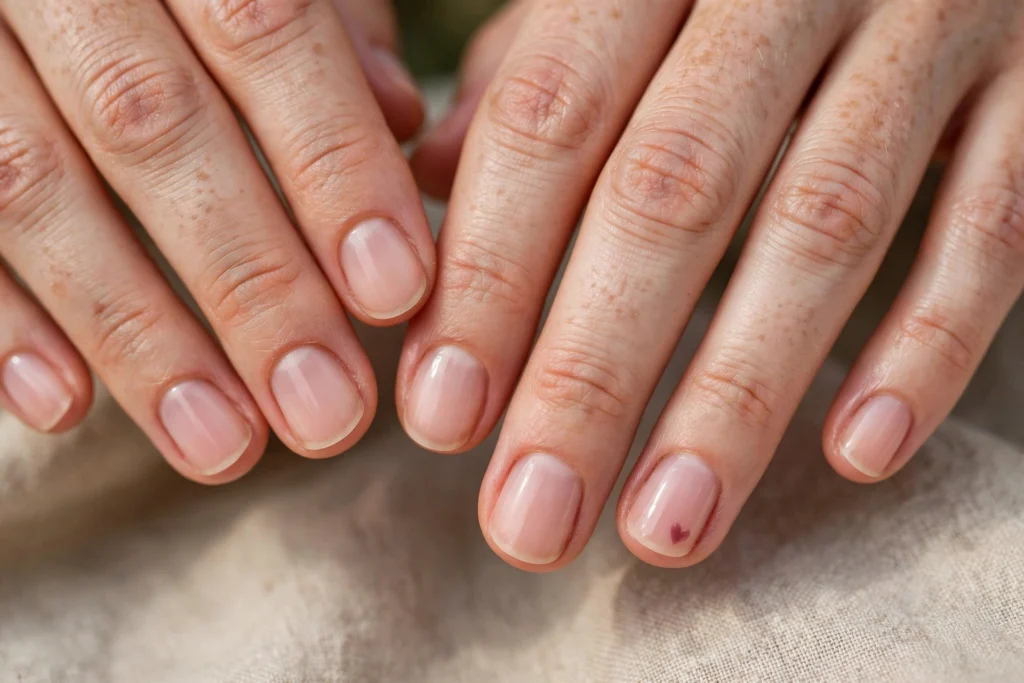
Short natural Valentine’s nails are the most practical option on this list, and they prove that you do not need length to join in. Keep the nails trimmed, filed, and neatly shaped, then apply a sheer blush or milky pink polish that evens out the nail without hiding it. A single tiny heart on one accent nail, or a thin red tip, adds the Valentine’s touch without any upkeep. A ridge-filling base coat smooths the surface, and a glossy top coat gives a healthy shine. File in one direction to prevent splitting, and push the cuticles back gently after a warm shower when the skin is softest.
This style is perfect for anyone who works with their hands, plays sport, or simply prefers short nails, because there is nothing to chip or catch. It also grows out invisibly, since the sheer polish blends with the natural nail as it grows. For a slightly dressier version, add a dot of gold glitter at the base of each nail, which reads as a quiet celebration. The finished look is clean, comfortable, and effortlessly festive. Reapply the top coat every two days to keep the shine alive, and keep the nails lightly oiled so they stay flexible instead of brittle.
Conclusion
Valentine’s nails work best when you choose one idea and commit to it, rather than mixing every heart, glitter, and shade into a single manicure. A classic red, a soft blush pink, or one tiny heart can carry the whole look, and the simplest designs are often the ones that photograph best. The goal is a manicure that feels festive, comfortable, and true to your own style, not a complicated project that leaves you frustrated. With the right base coat and a glossy top coat, even the simplest design will look polished.
Try one idea before Valentine’s Day, paint it the night before, and enjoy the holiday without a single nail worry. Save the designs that suit your routine, and repeat them with different colours and accents next year. With these fourteen ideas, you have a full season of romantic, heart-filled manicures waiting in the polish you already own. Your Valentine’s nails can be sweet, simple, and completely stress-free. Share your favourite design with a friend, or paint matching manicures together, because a little shared pampering makes the holiday feel even more special.
Frequently Asked Questions About Valentine’s Nails
What is the easiest Valentine’s nail design for beginners?
The minimalist single heart is the easiest, since it needs only a nude base and one tiny heart on an accent nail. A classic red manicure is another beginner-friendly option, because it needs no nail art at all.
How do I make my Valentine’s manicure last longer?
Start with a clean, oil-free nail, use a base coat, apply two thin colour coats, and seal everything with a top coat. Reapply the top coat every two or three days to keep the shine fresh and prevent chips.
Can I do Valentine’s nails on short nails?
Yes, short nails suit most of these designs, especially the minimalist heart, the pink jelly look, and the short natural manicure. Keep the hearts small and the colours sheer, and the design will look neat and intentional.
What colours work best for Valentine’s nails?
Cherry red, blush pink, burgundy, and soft nude are the most flattering Valentine’s shades, with gold or rose gold as an accent. Choose one main colour and one accent, so the manicure stays cohesive rather than busy.