Polka dots are the happiest little pattern in nail art, and they are having a major moment again. A few well-placed dots can turn the simplest manicure into something playful, polished, and surprisingly elegant, whether you keep them tiny and dainty or go big and bold. The best part is how forgiving this design is: dots do not need perfect lines, fancy tools, or salon-level skill, so even a beginner can get a charming result at home. With a toothpick, a dotting tool, or even the tip of a bobby pin, you can create endless variations in every colour you love.
This guide gives you fourteen polka dot nail ideas, from classic white dots on nude to colourful confetti patterns and chic French-tip twists. Each idea explains the colours, the dot size, and the finish that make it work, plus small styling tips so your manicure looks intentional rather than accidental. Pick one that matches your mood, your outfit, or the season, and enjoy a manicure that is fun, fresh, and easy to wear every day. From soft neutrals to bright confetti colours, there is a polka dot look for every style and season.
In This Guide
- Classic White Dots on Nude
- Black and White Polka Dots
- Tiny Dainty Dots
- Polka Dot French Tips
- Colourful Confetti Dots
- Pastel Polka Dots
- Red and White Retro Dots
- Gold Polka Dots on Deep Green
- Oversized Statement Dots
- Polka Dots with a Glitter Accent
- Two-Tone Dot Patterns
- Polka Dot Negative Space
- Mini Dots on Matte Nails
- Polka Dots for Short Nails
- Conclusion
- Frequently Asked Questions About Polka Dot Nails
1. Classic White Dots on Nude
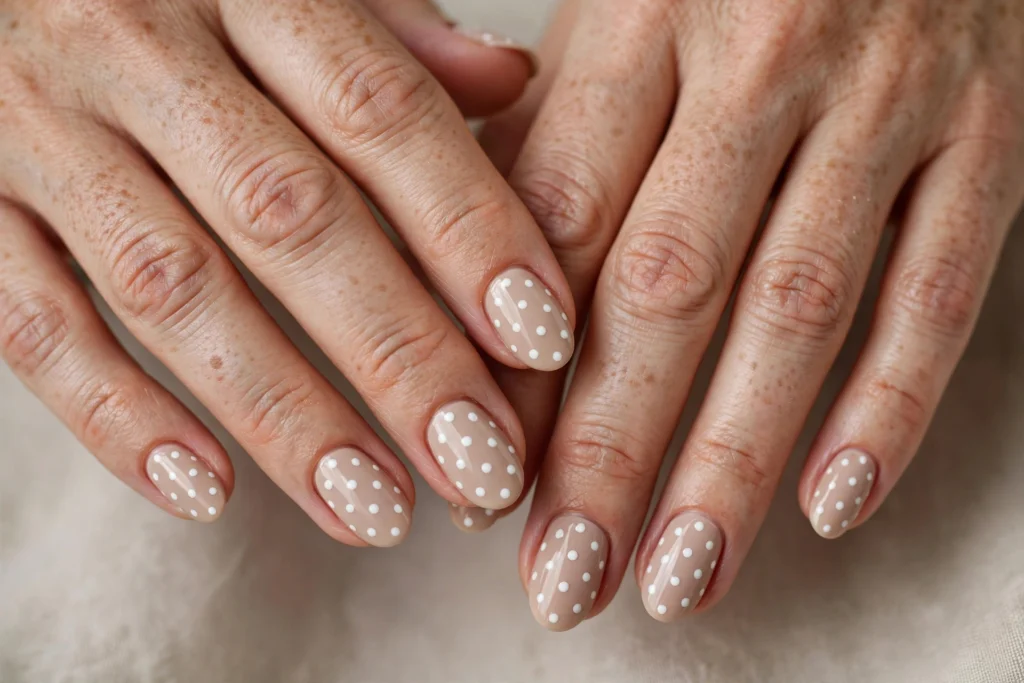
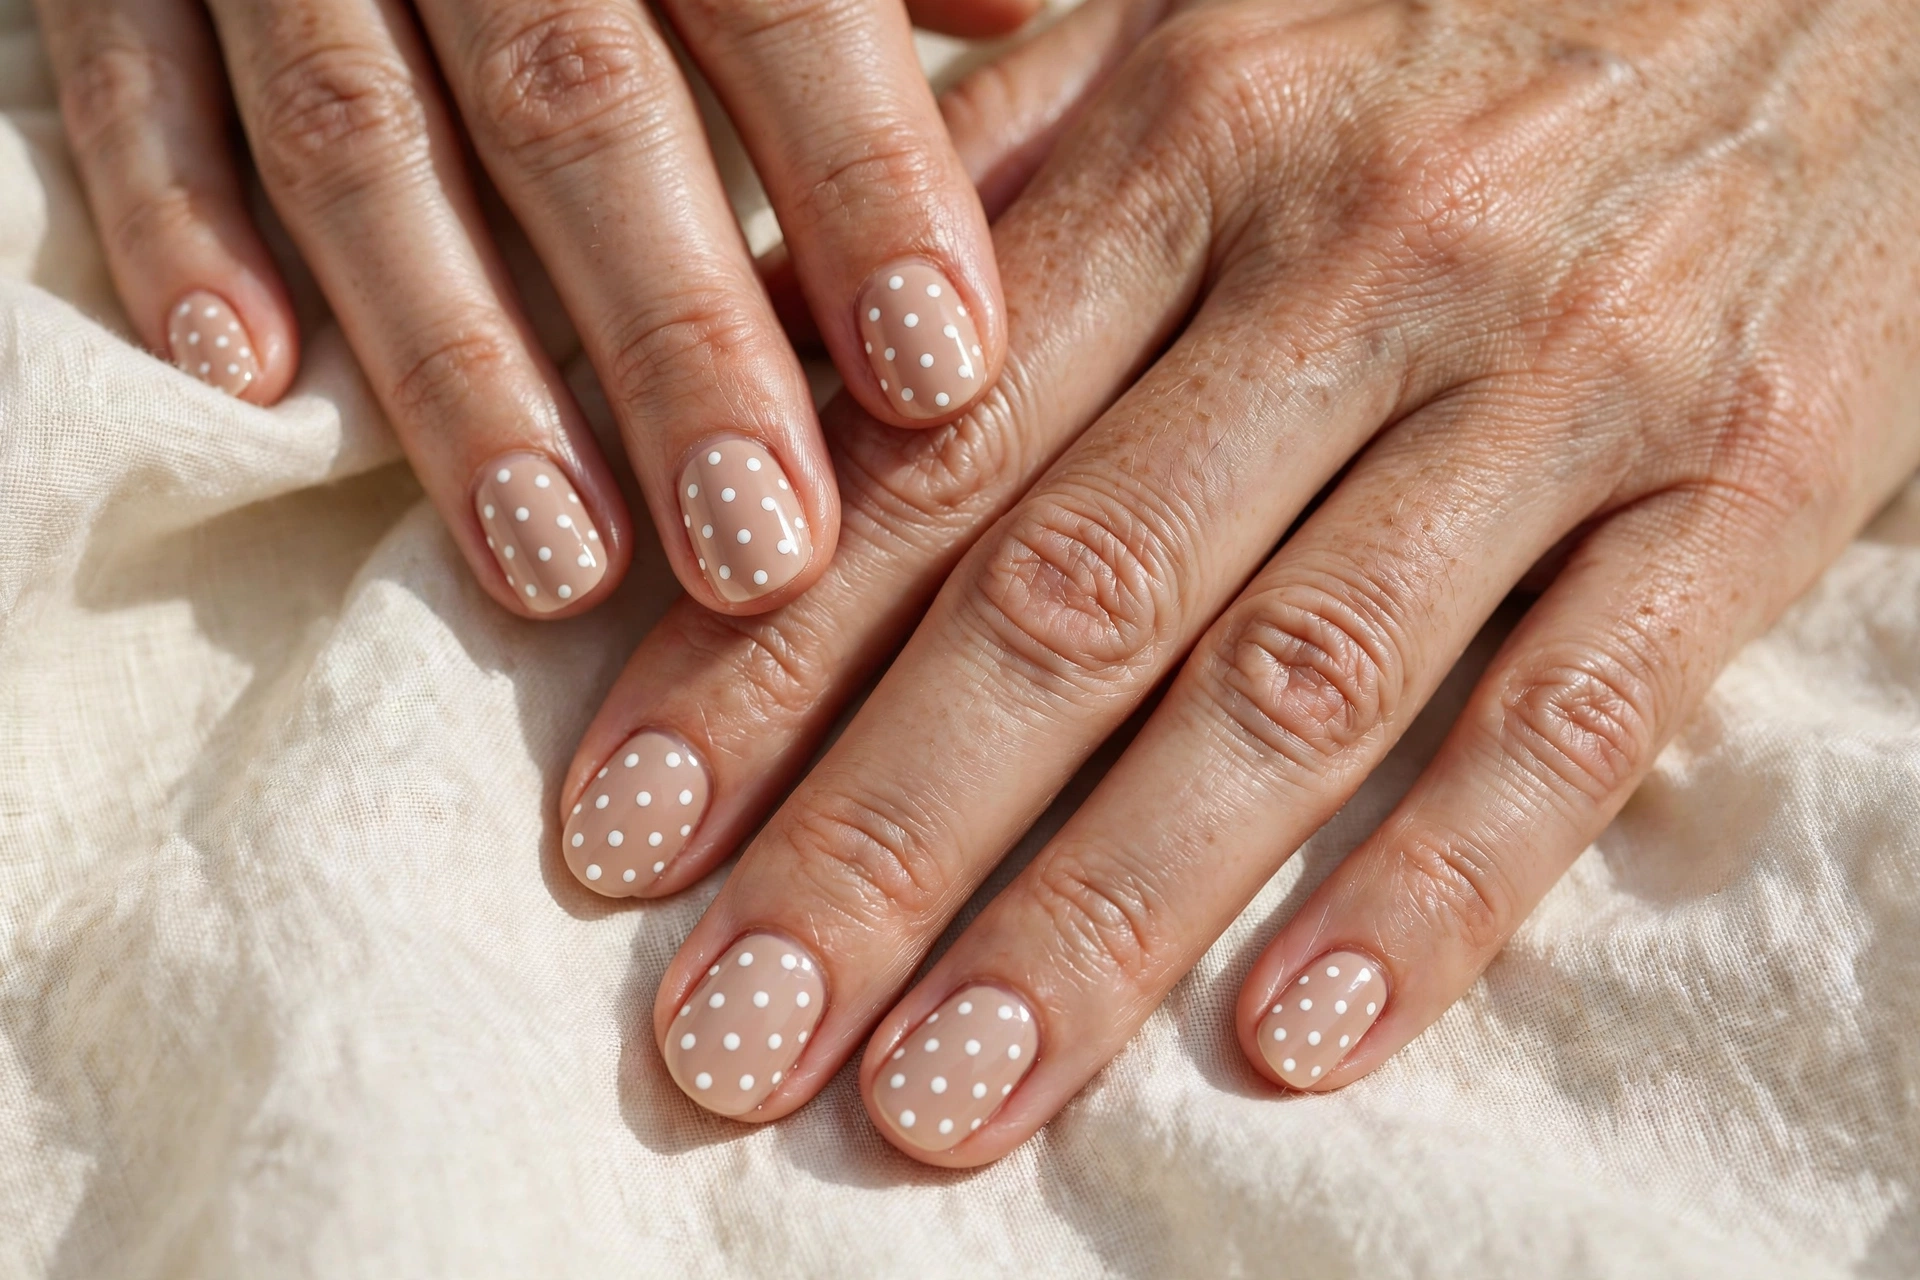
White dots on a nude base are the polka dot manicure that works with absolutely everything. The soft neutral background keeps the look elegant and understated, while the crisp white dots add just enough playfulness to make your nails feel special without shouting for attention. This combination suits every skin tone, every nail length, and every occasion, from the office to a wedding, because it reads as clean, fresh, and quietly feminine. It is also the easiest polka dot design to try first, since a nude base forgives small mistakes and white polish shows up clearly on top of it.
To get the look, apply two coats of your favourite nude shade, let it dry fully, then add evenly spaced white dots with a dotting tool, starting at the centre of each nail and working outward. Keep the dots medium-sized and evenly spaced for a classic feel, or vary them slightly for a more relaxed, hand-painted charm. A glossy top coat seals everything in and makes the white pop against the nude. This manicure pairs beautifully with gold jewellery, soft neutrals, and light pastel outfits, and it grows out gracefully between appointments.
2. Black and White Polka Dots
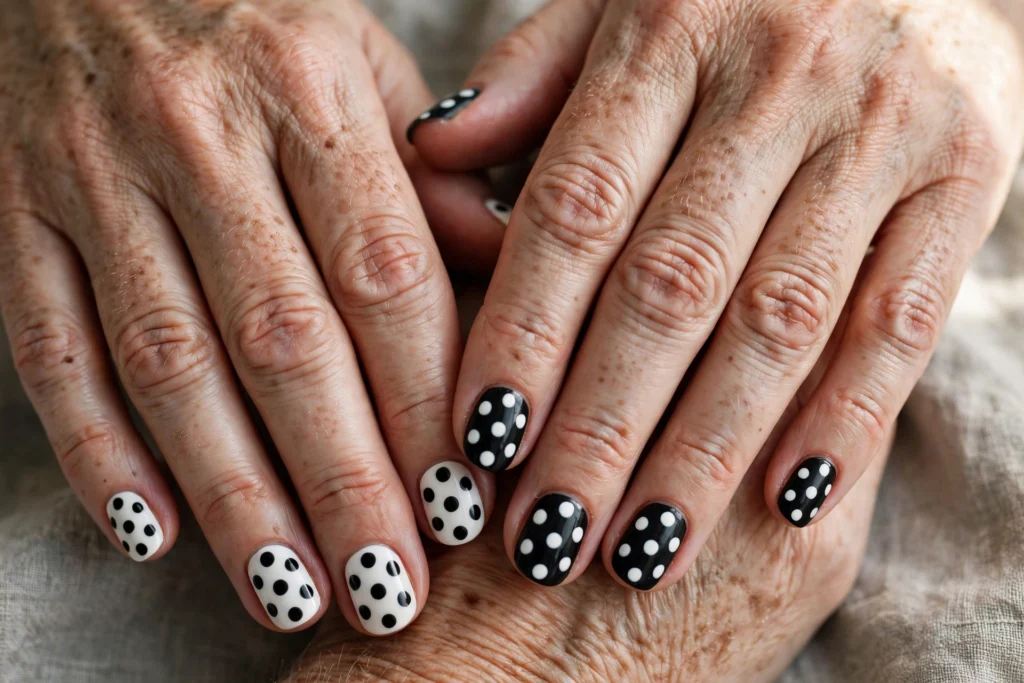
Black and white polka dots are bold, graphic, and endlessly chic, like a little black dress for your nails. The high contrast between the two shades makes the pattern pop from across the room, yet the design stays timeless because it never depends on a trendy colour. That staying power is why black and white dots remain a favourite season after season. You can wear it with monochrome outfits for a coordinated, fashion-editor effect, or let it be the one bold detail against a simple, quiet look. This is the polka dot manicure for anyone who loves strong, clean, confident style.
There are two main ways to wear it: white dots on a black base for a dramatic evening feel, or black dots on a white base for a brighter, crisper daytime look. Both versions photograph beautifully, and both work on any nail shape, from short squares to long almonds. For extra polish, keep your dots neat and evenly sized, and finish with a glossy top coat that deepens the black and brightens the white. Add a single accent nail with the reverse colourway if you want a playful twist without changing the whole design.
3. Tiny Dainty Dots
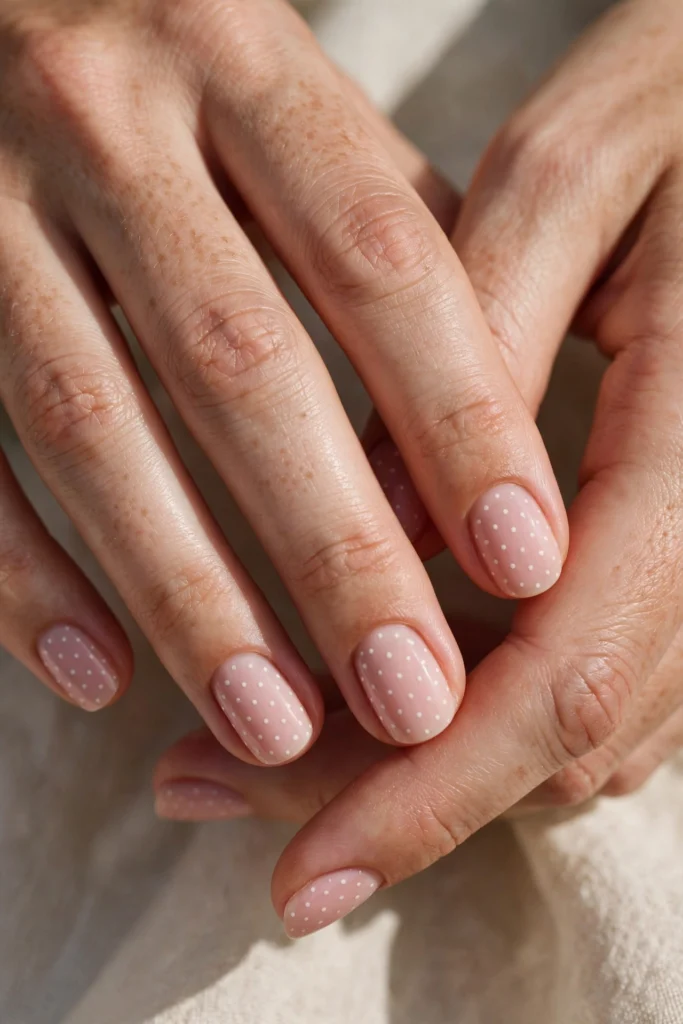
Tiny dainty dots are the minimalist version of polka dot nails, and they are perfect if you love subtle, refined nail art. Instead of covering the whole nail, this design uses a scattering of very small dots, often just three or four per nail, spaced with plenty of breathing room. The effect is delicate and jewellery-like, like tiny pearls resting on your nails, and it works beautifully on short nails and natural shapes. Because the dots are so small, the manicure looks polished rather than busy, even up close. The result feels elegant and quietly luxurious.
Choose a soft base, such as blush pink, milky white, or sheer nude, and add tiny dots in white, gold, or a muted accent colour. A fine dotting tool or a toothpick gives you the most control, and wiping the tool between dots keeps each one crisp and round. You can place the dots in a neat row down the centre, cluster them near the cuticle, or scatter them randomly for a more organic feel. A thin top coat protects the design without burying the delicate dots under too much shine.
4. Polka Dot French Tips
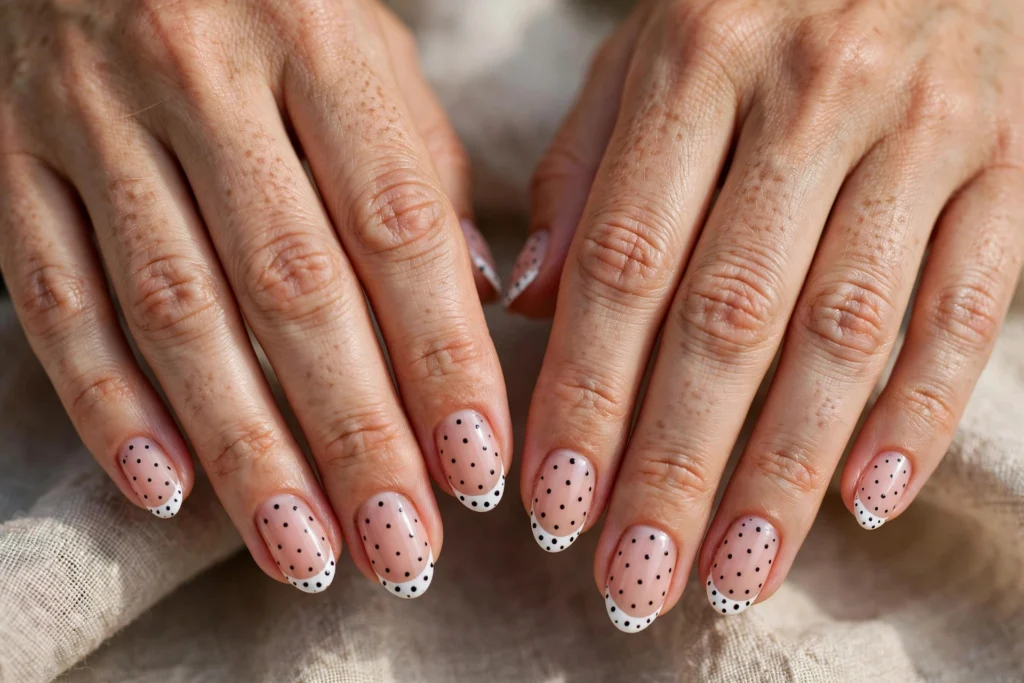
Polka dot French tips take the classic French manicure and give it a playful, modern twist. Instead of a plain white tip, you paint the tip in your chosen colour and scatter dots across it, or you keep the tip white and add tiny dots along the smile line. Either way, the result feels fresh and fun while keeping the elegant, elongated look that makes French nails so flattering. This design is a lovely choice for weddings, parties, and everyday wear, because it balances sophistication with a hint of whimsy.
For a soft version, use a sheer pink base with white tips and a single row of tiny dots in the same white. For a bolder version, try coloured tips in red, navy, or forest green with contrasting dots on top. Keep the dots small and tidy near the tip so the design stays crisp, and use a thin brush or dotting tool for precision. A glossy top coat smooths the edge between the tip and the base, so the whole manicure looks seamless. This is also a forgiving design, since small dot variations near the tip look intentional rather than messy.
5. Colourful Confetti Dots
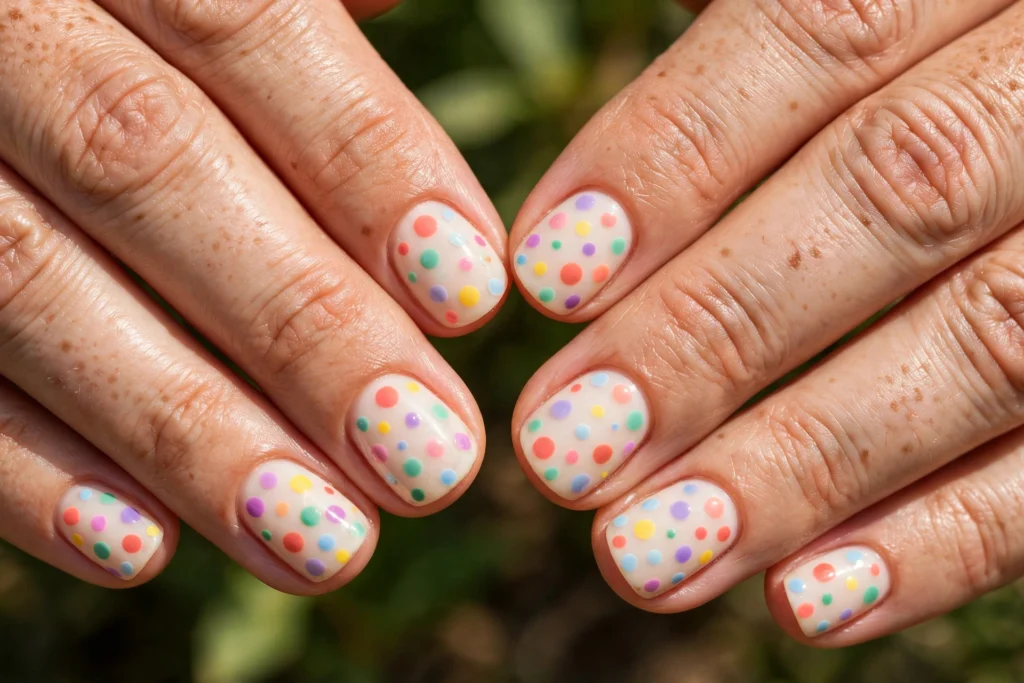
Colourful confetti dots are pure joy in manicure form, like a handful of sprinkles scattered across your nails. This design mixes dots in several bright colours on a clear or milky base, and the result is cheerful, youthful, and perfect for birthdays, holidays, and summer parties. Because the dots are meant to look random, there is no pressure to make them even or perfectly spaced, which makes this one of the most relaxing nail art designs to create at home. Every nail becomes a tiny celebration. It is a design that always makes people smile.
Start with a clear or pale milky base, then add dots in three to five colours that make you happy, such as coral, mint, sunshine yellow, lavender, and sky blue. Vary the dot sizes a little, mixing tiny dots with a few larger ones, so the pattern feels lively rather than flat. A dotting tool works best, but the rounded end of a pencil or a toothpick will do in a pinch. Seal the design with a glossy top coat, which makes the colours pop and protects the dots from chipping. This manicure pairs beautifully with simple outfits, letting your nails be the fun part.
6. Pastel Polka Dots
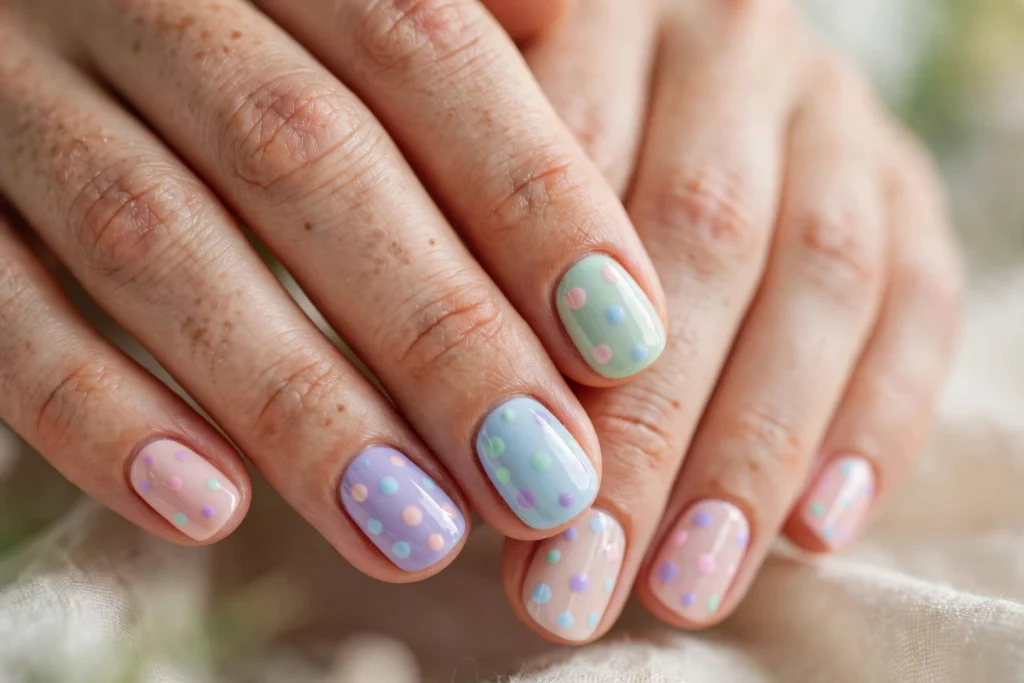
Pastel polka dots are soft, dreamy, and endlessly wearable, like springtime on your fingertips. Shades of lavender, baby blue, mint, blush, and lemon create a gentle, harmonious palette that flatters every skin tone and suits every season, though they feel especially lovely in spring and early summer. The pastel palette keeps the dot pattern light and airy, so even a full-coverage polka dot design looks delicate rather than loud. That gentle palette is exactly why pastel dots suit so many occasions. This is a wonderful choice if you love colour but prefer a calm, romantic mood.
One pretty approach is a single pastel base, such as pale lilac, with white dots scattered across it. Another is a pastel rainbow, where each nail gets a different pastel base and matching or contrasting dots. Both look lovely, and both are easy to adapt to your wardrobe. Keep the dots medium-sized and evenly spaced for a classic feel, or cluster them toward the tip for a softer gradient effect. A glossy top coat makes pastels look fresh and creamy, while a matte top coat gives them a velvety, modern finish.
7. Red and White Retro Dots
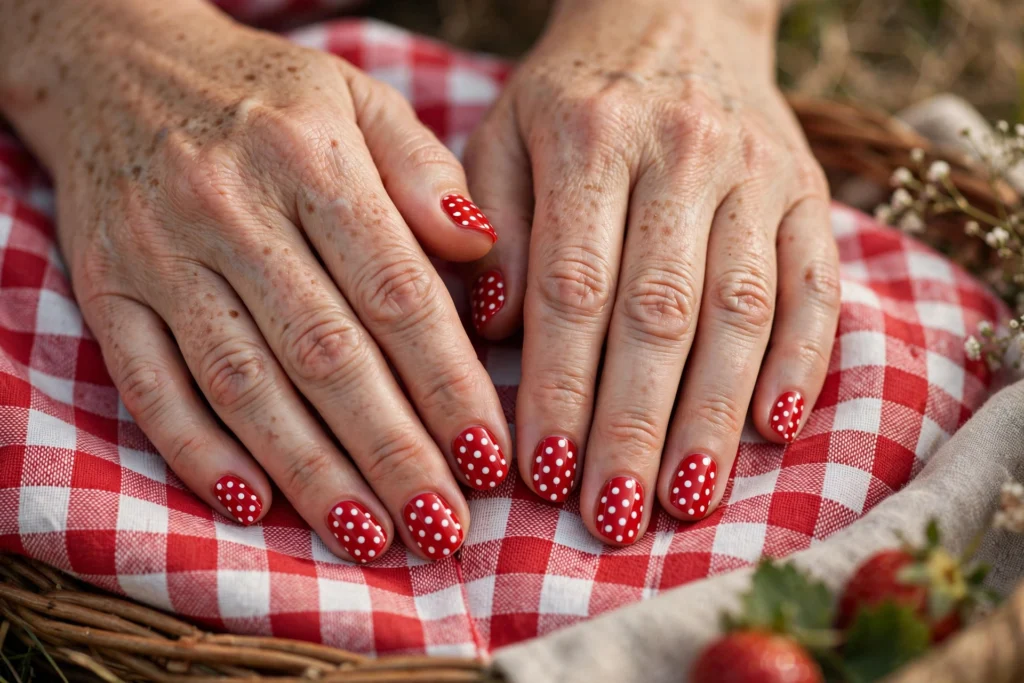
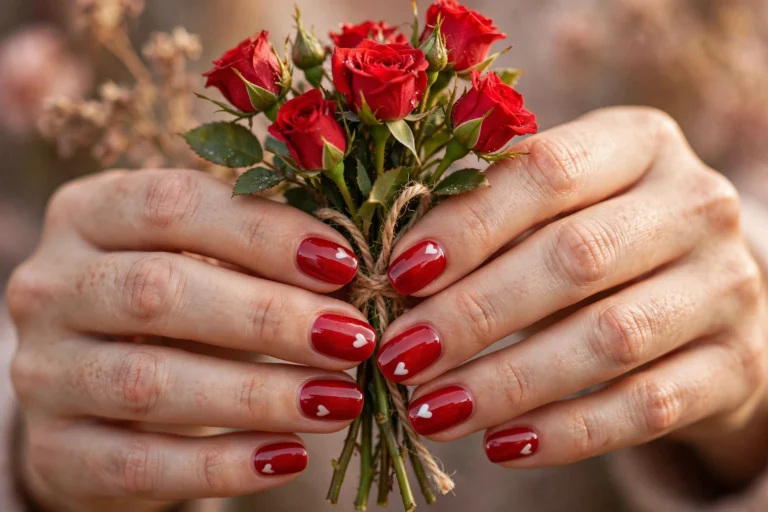
Red and white polka dots are pure retro charm, the kind of pattern you picture on a vintage summer dress or a classic picnic blanket. This combination is bold, cheerful, and a little nostalgic, and it works beautifully for holidays, parties, and anyone who loves a confident pop of colour. The contrast between the rich red and the crisp white keeps the pattern lively, while the simple two-colour palette keeps it from feeling busy. It is a manicure with real personality. It is a manicure that feels joyful, confident, and wonderfully timeless.
You can wear red dots on a white base for a bright, summery feel, or white dots on a red base for a deeper, more dramatic look. Both versions are striking, and both pair wonderfully with denim, white tops, and gold accessories. For a retro twist, add one accent nail with a gingham or bow detail, or keep all ten nails in the dot pattern for maximum impact. Keep the dots round and evenly sized for a polished vintage feel, and finish with a glossy top coat that makes the red look rich and the white look clean.
8. Gold Polka Dots on Deep Green
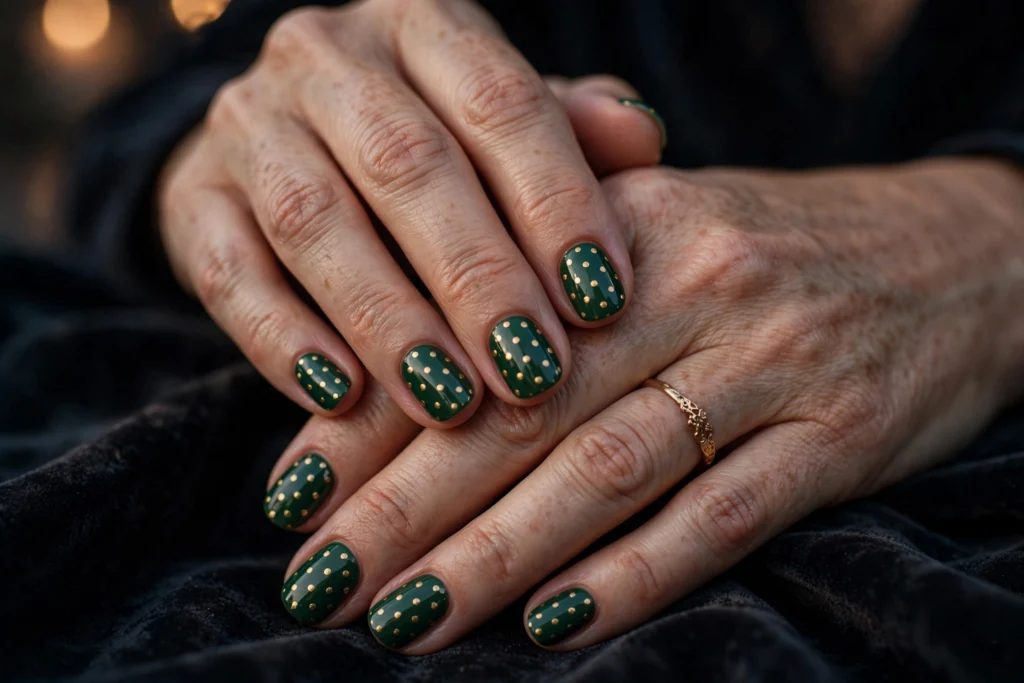
Gold dots on a deep green base are pure elegance, like jewellery for your nails. The rich, dark green makes the metallic gold dots glow, creating a manicure that feels festive, luxurious, and perfect for evenings, holidays, and special occasions. This combination has a jewel-toned richness that works beautifully in autumn and winter, yet the dot pattern keeps it playful rather than formal. It is a lovely choice if you want a manicure that feels special without being over the top. The jewel-toned pairing feels rich, festive, and beautifully refined.
Apply two coats of a deep emerald or forest green polish, then add gold dots in a neat, evenly spaced pattern. A metallic gold polish or a gold glitter polish both work, though metallic gold gives the cleanest, most refined dot. You can vary the dot sizes slightly, with a larger dot in the centre of each nail and smaller dots around it, for a more decorative effect. Finish with a glossy top coat to deepen the green and make the gold shine. This manicure pairs beautifully with gold rings, dark green outfits, and warm, candlelit evenings.
9. Oversized Statement Dots
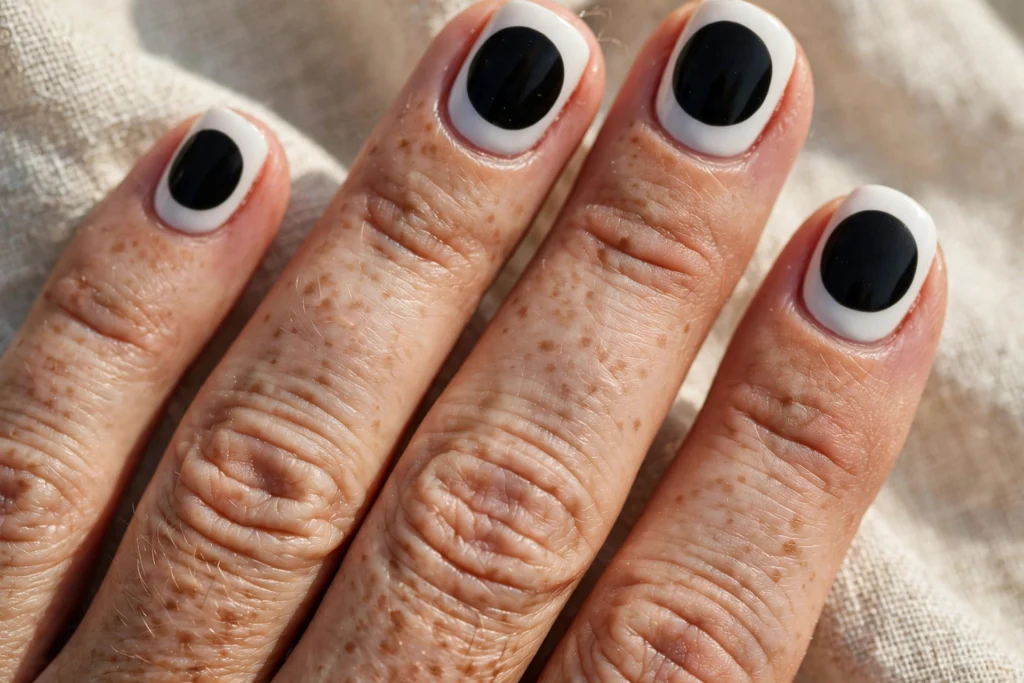
Oversized statement dots are for anyone who loves bold, graphic nail art that gets noticed. Instead of many small dots, this design uses just one or two large dots per nail, often placed off-centre or near the tip, creating a modern, almost abstract effect. The large scale makes the pattern feel artistic and fashion-forward, like a pop-art print for your nails. It is a confident look, and it works especially well on longer nails, where the big dots have room to breathe. The clean, spacious layout is what makes the design feel so modern.
The key to this design is contrast and placement. Try black dots on a white base, white dots on a bright red base, or navy dots on a soft beige base, and keep the rest of the nail clean and simple. Place one large dot near the centre of each nail, or stagger the dots so they sit in different positions from nail to nail. A dotting tool with a wide head, or the flat end of a pencil, gives you a clean, round dot. Finish with a glossy top coat, and let the oversized dots be the star of the whole manicure.
10. Polka Dots with a Glitter Accent
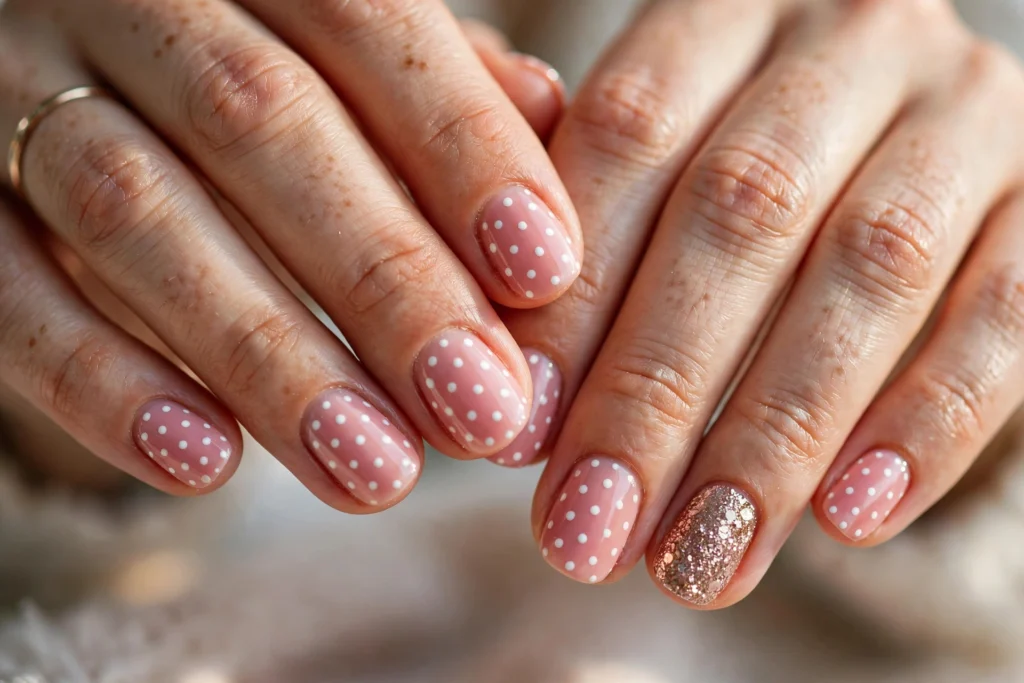
Polka dots with a glitter accent are the best of both worlds: the charm of dots plus the sparkle of glitter. This design keeps most nails in a classic polka dot pattern, then adds one or two glitter accent nails for a touch of glamour. The glitter can match the dot colour, contrast with it, or be a soft champagne that goes with everything. The result feels festive and polished, perfect for parties, weddings, and holiday celebrations, without the full commitment of an all-glitter manicure. That balance of sparkle and simplicity is what makes the design so wearable.
Choose your dot pattern first, such as white dots on blush pink, then pick one nail on each hand for the glitter accent. A full-coverage glitter polish, a glitter gradient from the tip, or a single glitter stripe all work beautifully as accents. Keep the glitter shade in the same family as the dot pattern so the manicure feels coordinated rather than mixed up. A glossy top coat smooths the glitter and makes it shine, and it also helps the glitter nails last longer. This is an easy way to make a simple dot manicure feel party-ready.
11. Two-Tone Dot Patterns
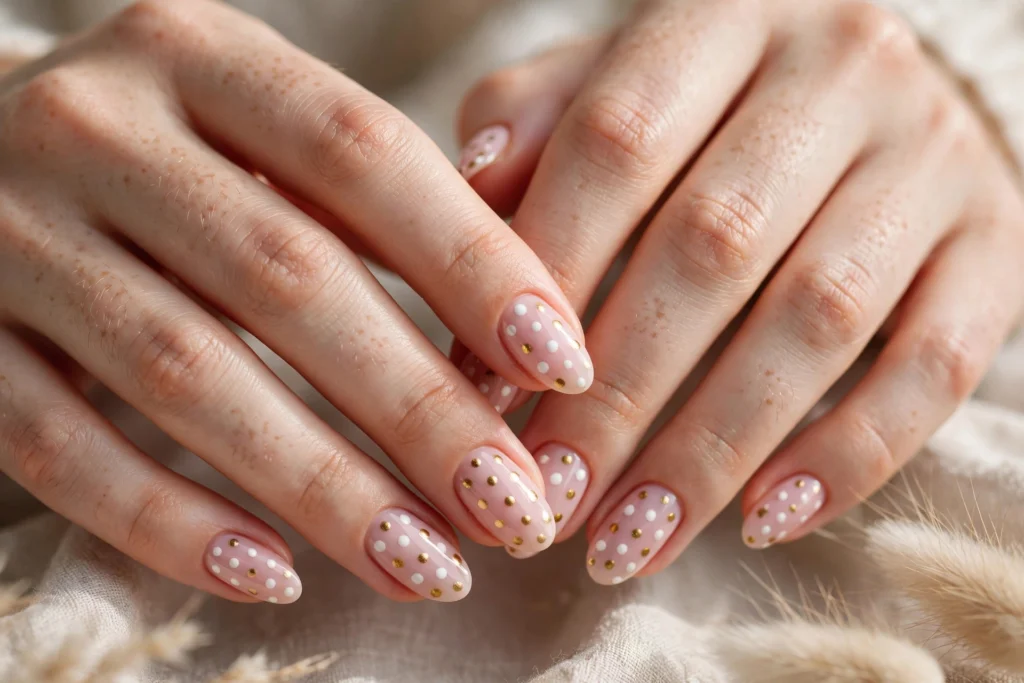
Two-tone dot patterns use two dot colours on one base, creating a richer, more layered look than a single-colour design. The two dot colours can be close neighbours, like blush and coral, or bold opposites, like navy and gold, and each pairing gives the manicure a different mood. This design is a lovely way to add depth to your nails without adding complexity, because the technique is exactly the same as a single-colour dot pattern. You just switch colours partway through. That easy technique is exactly why two-tone dots are such a popular choice.
A classic pairing is white and gold dots on a soft pink base, which feels romantic and elegant. A bolder pairing is black and red dots on a white base, which feels graphic and energetic. To keep the pattern balanced, alternate the two dot colours evenly across each nail, or use one colour for the main dots and the second for smaller dots tucked between them. A glossy top coat unifies the whole design and makes both dot colours look intentional. This manicure is a great way to tie together two colours from your outfit.
12. Polka Dot Negative Space
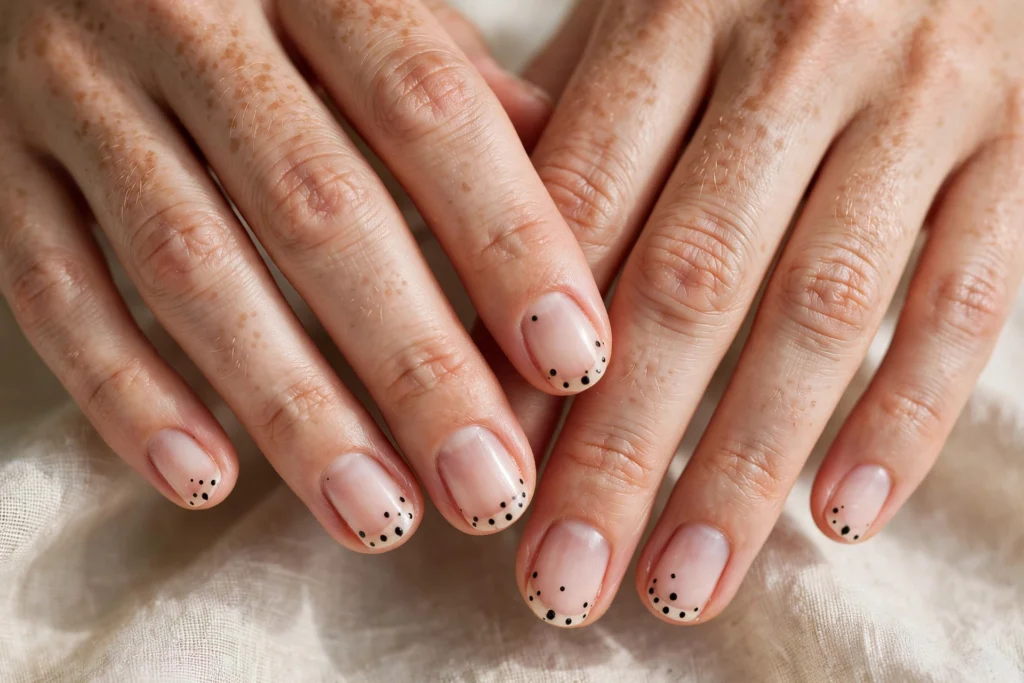
Polka dot negative space designs let your natural nail show through, creating a modern, airy manicure that feels fresh and effortless. Instead of painting the whole nail, you leave part of it bare or covered with a sheer base, then add dots only in certain areas, such as along the cuticle, down the centre, or across the tip. The bare space makes the dots stand out beautifully, and the design feels light and contemporary. It is also a practical choice, since regrowth is far less noticeable when part of the nail is already bare.
Start with a clear base coat or a very sheer nude, then add dots in your chosen colour in a neat row or a scattered cluster. White, black, gold, and pastel dots all look lovely against bare nails, and each gives a different mood. Keep the dots small and precise, since the negative space puts them in the spotlight. You can also leave one nail fully bare with just a single dot for a minimalist accent. Finish with a glossy top coat, which protects the dots and gives the bare areas a healthy, polished shine.
13. Mini Dots on Matte Nails
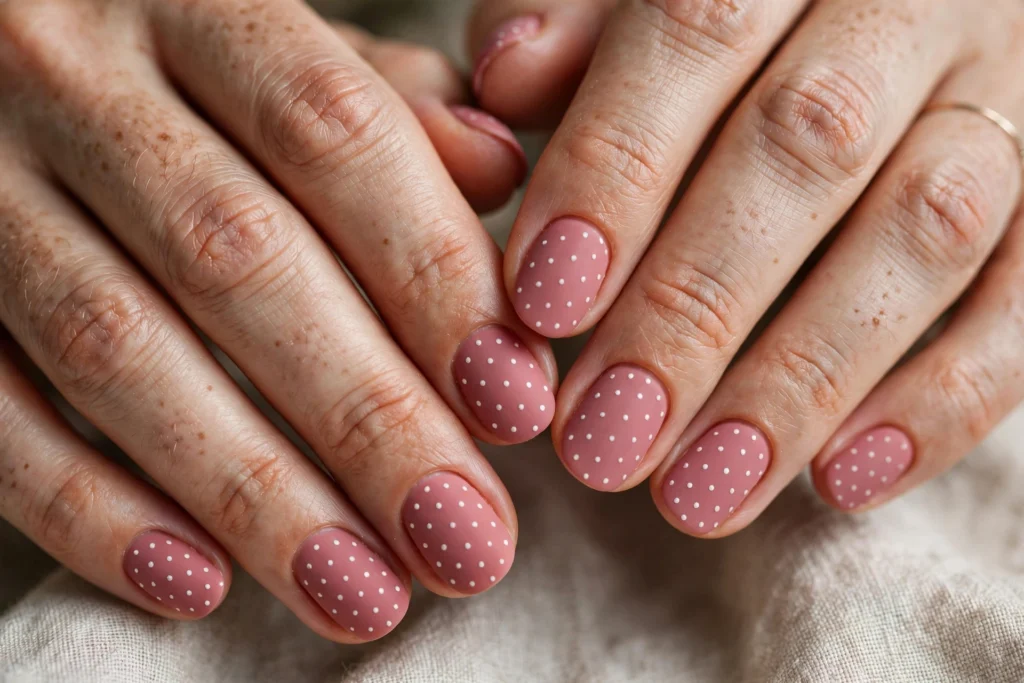
Mini dots on matte nails are a chic, modern twist that feels soft and velvety. A matte top coat removes the shine from your base colour, giving it a smooth, suede-like finish, and the tiny dots on top create a lovely texture contrast. This combination feels understated yet fashion-forward, like a quiet luxury manicure. It works beautifully in muted shades, such as taupe, dusty rose, sage, and slate, where the matte finish makes the colours look rich and refined. The soft, velvety finish is what gives this manicure its quiet luxury feel.
To create the look, paint your base colour, let it dry, then add tiny dots in a matching or contrasting shade. White dots on a matte dusty rose base are soft and romantic, while black dots on a matte beige base feel graphic and modern. Apply the matte top coat after the dots are dry, or leave the dots glossy for a subtle shine contrast against the matte base. Both finishes look lovely, so choose the one that suits your mood. This manicure is a wonderful everyday choice, since the matte finish is forgiving and the mini dots add quiet interest.
14. Polka Dots for Short Nails
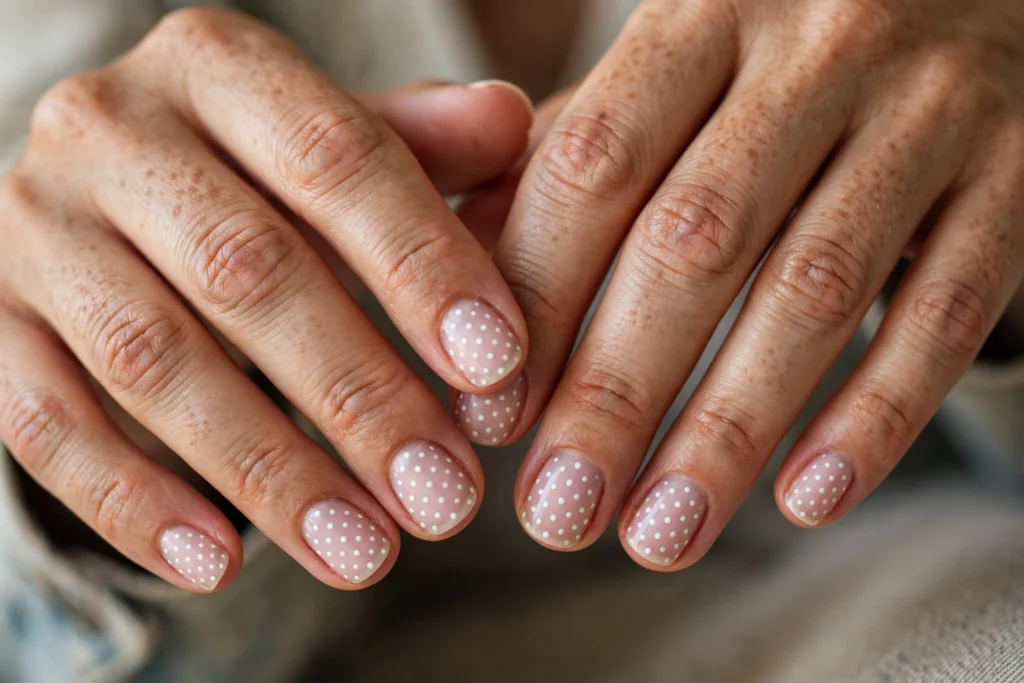
Polka dots are one of the best nail art designs for short nails, because dots do not need length to look good. Short nails can carry small, neat dots beautifully, and the pattern actually makes short nails look more polished and intentional. The key is scale: keep the dots small, keep the spacing generous, and avoid crowding the nail with too many dots. With the right proportions, short nails look charming, tidy, and completely on trend. That flattering scale is exactly why dots are such a favourite for short nails everywhere.
Choose a base colour you love, from classic nude to deep burgundy, then add three to five small dots per nail, depending on the nail size. A single row of dots down the centre is elegant and elongating, while a scattered pattern feels playful and relaxed. Tiny dots in white, gold, or a contrasting shade all work well, and a glossy top coat makes the whole manicure look fresh and finished. This design is also practical, since short nails are easy to maintain and the dot pattern grows out gracefully. Short nails and polka dots are a perfect match.
Conclusion
Polka dot nails prove that the simplest patterns are often the most charming. Whether you choose classic white dots on nude, bold black and white, playful confetti colours, or elegant gold dots on deep green, the dot pattern adapts to every mood, outfit, and occasion. The technique stays the same throughout: a steady hand, a simple dotting tool, and a little patience are all you need. That is what makes polka dots such a wonderful nail art design for beginners and experienced nail lovers alike. It is a design that never goes out of style.
Try one idea from this guide for your next manicure, and do not be afraid to mix colours, sizes, and finishes until you find your favourite combination. Save the designs that suit your style, and repeat them with different palettes through the seasons. With fourteen formulas to choose from, you have a full rotation of fun, fresh, and easy polka dot manicures waiting for you. Your nails can be playful, polished, and perfectly you, one little dot at a time. A little creativity and a steady hand are all it takes.
Frequently Asked Questions About Polka Dot Nails
What tool do I need to make polka dots on nails?
A dotting tool is ideal, but a toothpick, a bobby pin tip, or the rounded end of a pencil also works well. Wipe the tool between dots so each dot stays round and crisp.
How do I keep my polka dots neat and even?
Let each layer dry before adding dots, and use light, even pressure when placing them. Practise on paper first if you are new to dotting, and keep the dots small for the neatest result.
Can I wear polka dot nails to work or formal events?
Yes, choose a subtle version, such as tiny dots on nude or a single accent nail. Soft, neutral palettes and small dots look polished and appropriate for most settings.
How do I make my polka dot manicure last longer?
Apply a good base coat, let every layer dry fully, and finish with a glossy top coat. Reapply top coat every two or three days to protect the dots and keep the shine fresh.